For my general thinking about quiet books, and more ideas, please see this earlier post. Most of my efforts have been double page spreads with two singles, so they can be removed as a set from the book so they can be doled out. I've described how I did this in a separate post, together with some links to other pages I really like, and other pages I'd like to have made, if I'd ever had time!
This double page spread has at its centre a cooking hob and a breakfast table. Again, this comes from Imagine Our Life, with only minor alterations. The person who runs this web site generously provides not only pictorial ideas and tutorials, but templates for many of her ideas.

In fact, I pretty much followed Stephanie's tutorial in almost all respects. Only two differences, one minor change to content, and one small change to making the pieces.
First, you'll note that there are no pancakes and syrup in my version. I thought my grandchildren might find it very odd to have that for breakfast rather than as a pudding. (In fact, they mostly just have a bowl of cereal or toast, but will have seen cooked breakfast on holiday, and they know what bacon and eggs are.)
So I replaced the pancakes with sausages. To make these, I used more or less the banana inside pattern (without the pointed end) and cut two layers of a pinky-flesh colour. Then, before sewing and stuffing them, I part stained half of each by rubbing a used wet tea bag along one side, to make them look cooked.
I have to say that the children were not entirely convinced by the bacon - looks like no bacon they know, and they are used to back bacon, not streaky. They easily recognised the egg, sausages and banana though!


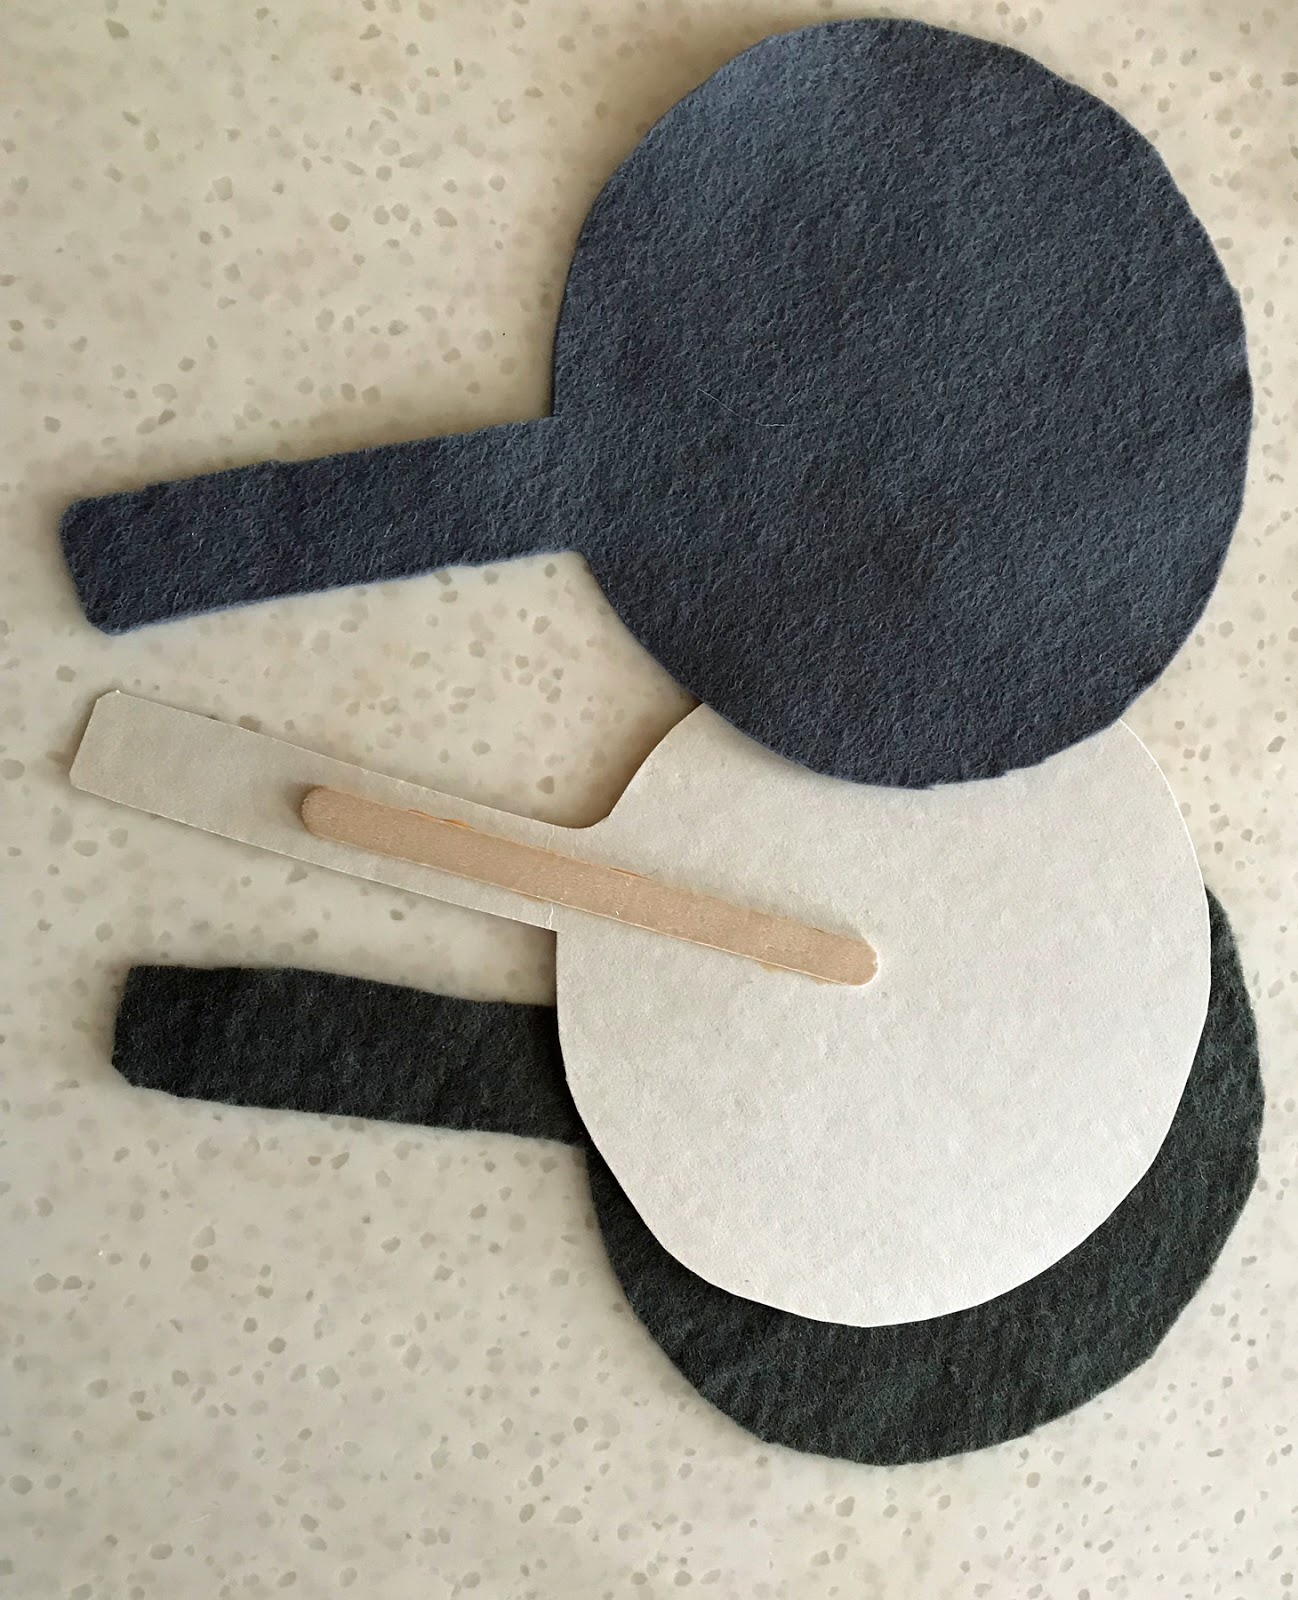
As Stephanie suggests, I made a pocket of clear plastic to go over the work counter, to store the pan, cutlery and food items when not in use.

The only other thing I did differently was to make the pan handle and cutlery a bit more substantial, by using coffee stirrers / lolly sticks inside.

Here's the fork with the stick pushed partially inside it, I then cut off the excess and finished sewing the two layers together.


The two single pages on the back were an abacus, and a Mr / Mrs Potato Head. First the abacus:

This was made with elastic cord, and some small animal beads threaded on it. Each number has a different animal, and the colours progress from pink, blue, green, yellow, orange, wihte and red. I hand-cut all the number to sew on to the sides, before attaching the sides to the page. (Afterwards I discovered that you can quite cheaply buy ready-cut numbers, so I did so for the next project!) I couldn't have got more than 7 because of the limited range of animals and colours (not evenly spread), but I thought that was fine for children that were only just starting to count and reconise number symbols.
The sides are stitched firmly over the elastic so it doesn't pop out.
The final (single) page was Mr / Mrs Potato Head. When I was young, you used to just vuy the plastic features (eyes, noses etc) - and you used to stab them into a real potato! I don't know when that stopped (health and safety / hygiene?) but by the time my children had them, they were provided with plastic heads, so no need for real potatoes.
The grandchildren have all had them too, so although they've pretty much outgrown them now, they still recognised what these were. So they were able to get a short period of amusement from them. The design and templates came from Sunshine, Lollipops and Rainbows. Like the designer, I decided Velcro wasn't necessary, and in fact would propably cause the felt to pill. So the child can just place the pieces where she likes.


The pot on the right is intended as storage for the pieces. However, if I did this differently I would lay it out so that I could have a larger pot. It would be better as the double page spread that Jocelyn and Jason planned on their pages (also with templates which I reduced down), but I was in desperate need of a single page!)

What this meant was that the pot was very lumpy, making the page very thick. Which also meant the pieces had a tendency to pop out. So I made a little drawstring bag for them to go inside the pot.

It's still thick, but hopefully we'll be less likely to lose the bits on the plane.
No comments:
Post a Comment